This tutorial is intended to assist the Library Webmaster in configuring Connect IN Email accounts used in Outlook.
Go to the Tools Menu => Options…
Select Mail Setup => E-mail Accounts…
Click New…
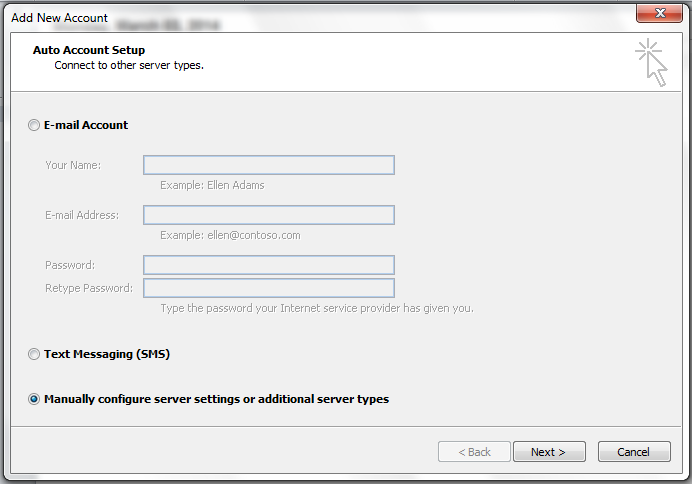
Click Next >
Select the “Manually configure server…” option.
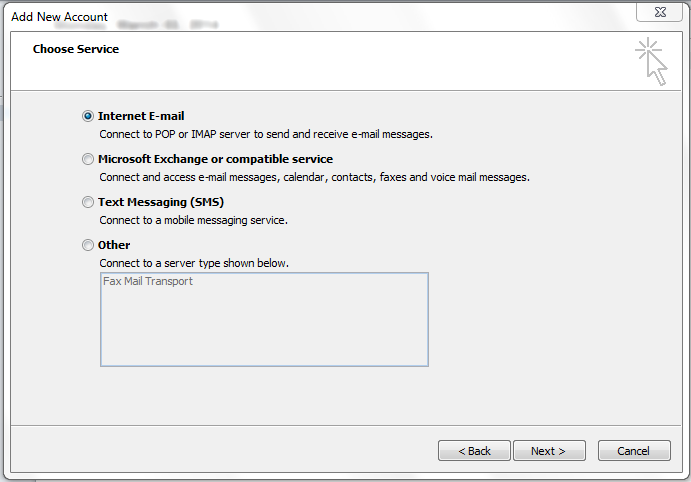
Click Next >
Internet E-mail should be chosen.
Click Next >
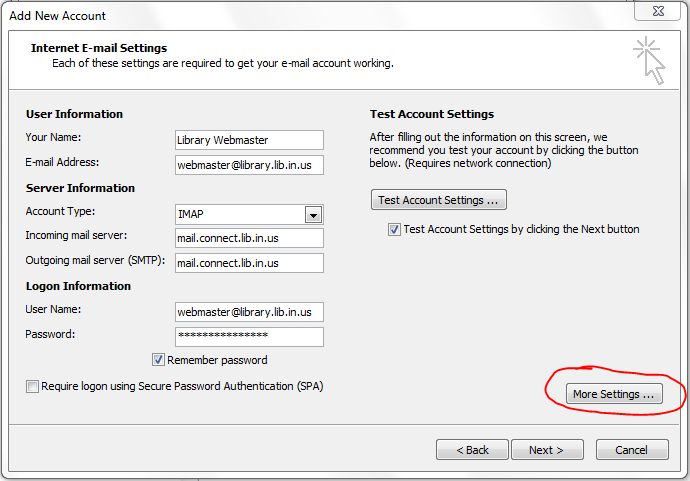
User Information:
- Your Name: Enter your name (as you wish it to appear in outgoing email).
- E-mail Address: Enter your email address.
Server Information:
- Select Account Type => IMAP
- Incoming Mail Server: mail.connect.lib.in.us
- Outgoing Mail Server: mail.connect.lib.in.us
Logon Information:
- User Name: Enter your email address.
- Password: Enter your Connect IN Email password.
Click “More Settings…”
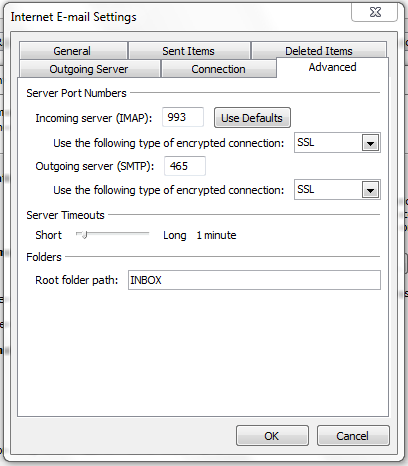
Select “Advanced”
Click on the box next to “Incoming server (IMAP):”
Replace 143 with 993
Click the arrow next to “Use the following type…” under it
Select “SSL”
Click on the box next to “Outgoing server (SMTP):”
Replace 25 with 465
Click the arrow next to “Use the following type…” under it
Select “SSL”
Click on the box next to “Root folder path:”
Enter the following: INBOX
Compare your settings with the image above to verify.
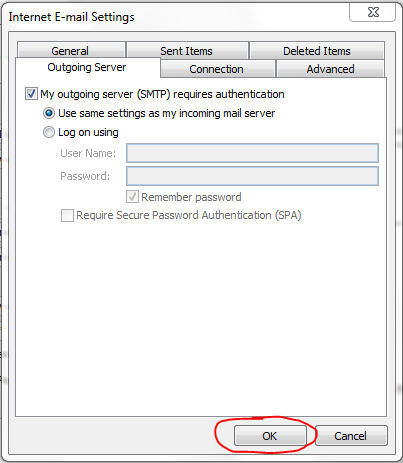
Select Outgoing Server
Check “My outgoing server requires authentication”
Click OK
Click Next>
Click Finish
If you experience any problems configuring Outlook, contact the Connect IN Helpdesk, and we’ll be happy to assist you!
